Stitching Idyllic

Stitching Idyllic by Ann Bernard

  • Home
  • Blog
  • Spring Flowers
  • Summer Flowers
  • About Ann

09/02/2018 by Ann Bernard

The Hastings Embroidery.

For those who are unaware of this national treasure, here are some facts:

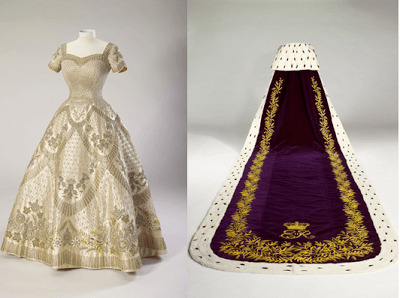
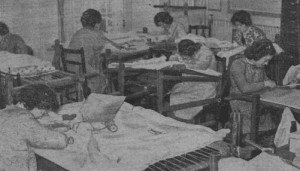
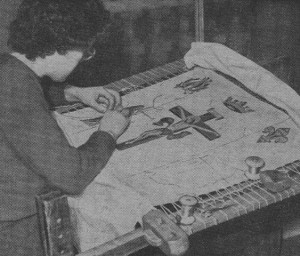
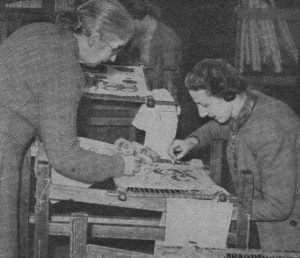
The Hastings Embroidery was commissioned by Group Captain Ralph Ward, or, the County Borough of Hastings. It was made by the Royal School of Needlework in 1965 to celebrate the 900th anniversary of the Battle of Hastings in 1966. It consists of 27 panels, each 9′ – 3′ and shows 81 great events in British history that occurred during the 900 years between 1066 and 1966. It took 22 embroiderers 10 months to complete.

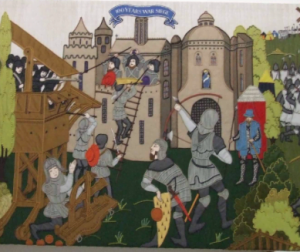
This is the first panel and shows King William being crowned at Westminster Abbey. Crowd control was necessary as the Saxon inhabitants were not happy with his take over of England. He built a lot of castles/fortresses including the Tower of London.

The Hastings Embroidery was stitched before the Overlord Embroidery  (1968-69 -70 approx), and is also worked in applique. It uses antique fabrics, modern fabrics, cord, thread, leather and some feathers contributed by the parrots at the London Zoo. I have no information on the designer. It is bright/vivid/colourful and vibrant.

It was given to the town/city of Hastings who currently have two panels on display in the Town Hall. The first picture above is one of these.

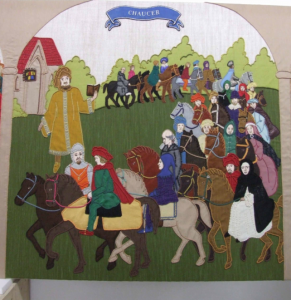
Chaucer and the Canterbury Tales

This enormous historical embroidery needs to be displayed in a building that is climate controlled such as the one in which the Bayeux Tapestry is displayed. The Overlord will also be displayed in a climate controlled environment when the Portsmouth Museum reopens the gallery later in 2018.

Hastings says that it is unable to afford a suitable building for this and has been saying so for the last 52 years.

In reality, this is a National Treasure and should be hung in an environment that is part of the British National Heritage. I am thinking of London Museums such as the Victoria and Albert or the British Museum. Maybe there is a suitable venue for it in Windsor? Is there space in Hampton Court Palace which is also the location of the Royal School of Needlework.

Or, could a new building be located in the area of Hastings or Battle become its permanent home.

It is a dramatic and a graphic lesson on British History.

The Hundred Years War.

It would make a wonderful history teaching book both in the Coffee Table size and for School Libraries. For a publishing company, it would be a great marketing tool and some profits could go to helping establish a permanent home for the panels.  With young people already aware of the existence of these panels, it would be on the worthwhile outings list for every school.

Think about it world.

This is a national responsibility.  It is a shame that it remains in storage (apparently in London) rather that being available for the public to see  and enjoy. Maybe the upside of this is that it is stored in a climate controlled space and is not suffering deterioration.

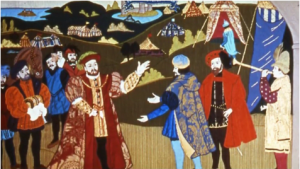
King Henry VIII welcoming the King of France.

One of the final panels is of Sir Winston Churchill on the White Cliffs of Dover.  This makes it a continuous narrative with the Overlord Embroidery. His right hand is making his famous salute and his left hand  holds a cigar.

[do_widget id=arpw-widget-2]

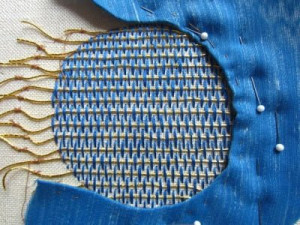
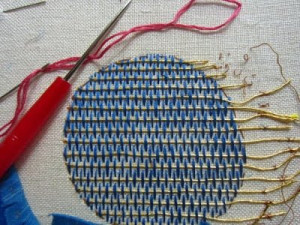
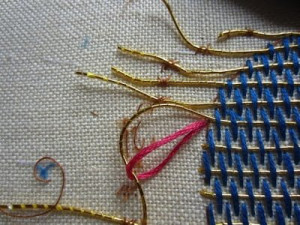
The photos are screen shots. My apologies for the poor quality which do not do justice to the originals.

A 45 minute film of the complete Hastings embroidery can be viewed at The Hastings Embroidery – https://www.youtube.com/watch?v=CZbfbDvoEa8. It is worth the time to view it.

Feel free to forward the link to this series to friends and other interested persons.

Tomorrow:   The Magna Carta.

13/03/2014 by Ann Bernard

1870s in Britain: a Breakthrough for Education, Textiles and Embroidery

By the 1870s, there had been radical changes in Britain. The Industrial Revolution had been in progress for a century. The sources of power such as water, steam and electricity were developing and being accepted, manufacturing machinery was widely used, transportation systems were growing as were imports and exports, there had been a mass migration from the countryside to urban centres, the birth rate had accelerated and building in the cities had mushroomed. Legislation during the first part of the century had focussed on working conditions and the employment of child labour in the factories and mines. By the Education Act of 1870, education for children between the ages of 5 and 13 years became mandatory. This triggered the establishment of 3000 or more schools in areas where educational facilities were not adequate. The face of Britain had changed. The massive amount of building and the increase and redistribution of the population was a whole new world. And new worlds create challenges, and opportunities, that did not exist before.

One of these challenges was for employment and opportunities for unattached women. The lag in the development of labour saving devices for the home meant there were still many people in service in both large and smaller houses. Mechanization of farming also lagged behind the developments on the industrial front. This would continue until World War One and later. Labour saving devices for the home did not surface widely until after World War 11 when willing labour became scarce.

The result (that is of interest to stitchers) of this huge change in societal conditions was the founding of the School of Art Needlework. (Wow, we finally got there!). The Wemyss School of Firth was founded in 1877. Located in Scotland, its mission was to teach needlework skills to the daughters of miners and farmers so that they could find employment. Still in operation, even now revived, you can read more about this at: www.needlenthread.com (December 3, 2013). Mary Corbet wrote an article about the school including pictures. Well worth a visit. In 1879, the Leek School of Embroidery and the Embroidery Society were founded by Elizabeth Wardle though she had been embroidering for churches in the area since 1864. The school gave her the opportunity to pass her skills on to other women.

Wherever I read about embroidery in the nineteenth century, the subject of dying surfaces. Dyes for colouring fabrics and threads were originally sourced from plants, insects and minerals. Subtle in tone, they were not always colourfast. In the 1850s, aniline (chemical) dyes were discovered by an 18 year old chemistry student trying to create artificial quinine for the prevention of malaria. The number of colours proliferated but the processing was toxic. Even now, instructions on using aniline dyes include the necessity of a face mask and a well ventilated area. In 1878, Sir Thomas Wardle exhibited tussur silk cloth printed with patterns by William Morris. Included were tussur silk yarns dyed with rich but subtle colours. He also developed threads shaded between light and dark especially suited to Art Needlework. And from there on, Art Needlework flourished. The truism is correct. Given suitable fabric and threads, elegant embroidery will happen. We all, even now, owe Sir Thomas Wardle a huge vote of thanks.

[do_widget id=arpw-widget-2]

The School of Art Needlework was founded in 1872. The ‘Art’ was to differentiate it from the canvas work stitched with bright coloured wools known as Berlin Work. Berlin Work had been hugely popular for 50 years to the point that stitchers no longer knew how to do anything else. A revival and development of suitable skills was needed. Put together single women needing employment, the availability of fabric and silk threads, the consumerism and fashions of the Victorian era which created a market, some gifted interior designers whose interests were textiles and the Arts and Crafts Movement and the result is Opportunity. And from this, came our ancestor, the School of Art Needlework.

The interval between entries on this blog has lengthened. The history has required much research and encapulating it into a brief summary has not been easy. Also, my time has been focussed on writing a book on stitching Summer Flowers. It would be nice to complete this before warm summer weather arrives when a vacation from writing will be welcome. Our summers are too short to spend in front of a computer.

12/02/2014 by Ann Bernard

Getting Closer to the Founding of the Royal School of Needlework

Life’s events often seem to be the outcome of other events and a grand intermingling of individual and historical influences. Far fetched though it may seem, the founding of the Royal School of Needlework (RSN) was one of the outcomes of the Industrial Revolution.

In Britain, this started in the mid 1700s with the invention of the Spinning Jenny. Until that time, weaving was done on hand operated looms and it took three carders and three spinners to keep one weaver supplied with weft thread. This was essentially a cottage industry and England was famous for its wool and worsted cloth. The East India company started importing cheap cotton fabrics from India, China and Persia often printed with patterns now called chintz. The patterns were an easternized version of crewel work designs. About 1740, fabric brokers began supplying cotton to English weavers who wove it into fustian, a coarse and heavy cotton cloth which was made into clothing for the working man. From there, weaving looms were developed powered by animal or human energy. This form of mechanisation lasted a long time specially in rural and farming communities. One can see treadmills and wooden machinery in museums and historical villages dating back into the 1800s. Britain forbade the export of both machines and their design though enterprising individuals were able to remember the details adequately to reproduce the technology in other countries. An example of this is in Lowell, Massachusetts with its 19th century textile mills. In 1781 James Watt patented a steam engine with a continuous rotative motion. Steam power had been in existance for a long time but the use of it was not practical. The rapid development of powered industry is well known history but I wanted to ‘set the scene’ for the following.

The result of mechanization on the populace was profound. Coal and water provided steam and power, the mines needed labour as did every developing industry. The huge exodus of people from the country to the cities radically changed society. The birth rate soared and population increased. The numbers of working poor increased as did the wealth of the employers. The development of small businesses and tradespeople led to the emergence of the middle classes, something new to the British experience. There were the usual number of wars overseas which reduced the numbers of young men and death in childbirth took a heavy toll among young women. Wealthy ladies had their social lives to occupy them and the poor working classes struggled with injury, diseases, poverty and malnutrition. Mechanization was not available for household chores so service in the households of both the wealthy and the middle classes gave employment to a large number of the working poor. But there was a problem with occupying the excess number of middle class women who now had time on their hands but whose employment opportunities were extremely limited. They could be a companion or a governess. Nursing and office work had not yet been invented nor was education widely available. A need for acceptable employment for the middle class, something both genteel and clean, was evident.

Another factor was that Berlin Work had been the rage for 50 years and, although it is ideal for kneelers in churches, it was not a suitable technique for new vestments, altar frontals or for replacing those pieces that had worn out.

[do_widget id=arpw-widget-2]

Add William Morris to this mix. He was a gifted designer with a strong interest in textiles and interior design. He grew tired of Berlin Work and he was also tired of the often shoddy mass production of poorly designed goods. He sought a return to the days of simple items that were attractive and functional. He started the Arts and Crafts Movement. He met and became good friends with Sir Thomas Wardle. You will remember that Sir Thomas imported Tussar silk from India and developed methods of dying and spinning this silk which was cheaper than the fine silk threads available from China. Most importantly, he dyed silk threads that came in different shades of each colour (Leek Embroidery – November 26, 2013). This made Satin Stitch and Long and Short Stitching not only possible but gorgeous.

Some designs attributed to William Morris

I am sure there will be readers who will find this analysis to be inadequate and biased and, of course, they are quite right. There is no mention of transportation, science, slavery or the competition with almost every other country in the world but I wanted to focus on the effect the Industrial Revolution had on the development of textiles. The effect was a profound one.

In searching for designs by William Morris, this coat surfaced. Not made by Morris but inspired by him. I included it as I think that it is gorgeous. A fantasy garment. Hope that you like it too or find it interesting.

07/11/2013 by Ann Bernard

Another Beryl Dean Embroidery

Earlier this week, while looking for something else, I found a photo of another of Beryl Dean’s panels. They were commissioned by The Friends of St George’s Chapel. This Chapel is within the grounds of Windsor Castle.

This one, The Annunciation, is the first in a series of five. The finished size is 9′ x 4′ 6″. It would have required a special working framing as she described in her book.

The Annunciation Beryl Dean

The Annunciation Beryl Dean

I managed this time to get the colours a little nearer to their true colours. The halo area as well as the six flowers or flames are all stitched in a Whitework technique. In this, some of the threads from both the warp and the weft are removed. The remaining threads are used as the foundation for weaving in designs. I have never seen this used with colour and gold threads anywhere else. I think that other examples must exist somewhere and I know that you will tell me where they are.

[do_widget id=arpw-widget-2]
The Annunciation Beryl Dean Zoom

The Annunciation Beryl Dean Zoom

The book is Church Embroidery by Beryl Dean 1982. ISBN 0-264-66842-1

04/11/2013 by Ann Bernard

Windsor Castle and St. George’s Chapel

I have been on vacation in England and Europe visiting lifelong friends and family. Yes, I had a wonderful time because it is such a treat to see everyone and to spend time in London and the Channel Islands.

My cousin, who had written ahead and made the arrangements, and I visited Windsor specifically to see the Beryl Dean Embroideries. We were expected and were taken through the rope barriers to the case where the embroideries are now stored. The case was then unlocked by a staff member so that we could see all five of the banners. Everyone was most helpful and it made a huge difference that they were expecting us.

I had forgotten how large the panels are, probably around 10 feet high by 5 feet wide. The size makes them difficult to photograph but the guide book features this one: The Adoration of the Magi. A scan and a screen shot of the page in the book is the best reproduction that I am able to provide for you. This photo does not do the panel justice at all.

Adoration of the Magi Windsor Castle

Adoration of the Magi Windsor Castle

The background fabric was specially woven and is cream coloured with a silver thread included in the weft. When one has the opportunity to look closely the detail is fascinating and the workmanship incredible. But I would expect no less from such a talented designer and broideress. The closer one looked, the more one saw. All the faces were different in structure and expression and each one had eyes that saw you and returned your gaze. All the different techniques used were astounding.

Interestingly, though there is a lot of detail in the background, it remains in the background leaving the figures to be prominent and draw your attention. I have added an enlargement to give you a little more idea of the intricacy in every square inch of these embroideries. I wish that I could have provided better photos for you but this is the best that I can manage.

[do_widget id=arpw-widget-2]

Needless to say, if you should happen to be in Windsor, go to St Georges’s Chapel within the grounds of Windsor Castle. Write beforehand and tell them your schedule and ask to see the Beryl Dean Embroideries. At the moment, the lighting available near their locked case is poor but I have asked the Chapel to consider installing lighting that can be switched on only when visitors such as us make a request to see the panels. The case and the lack of any direct light will preserve these remarkable pieces for posterity and I hope that they will be enjoyed by many future generations.
Write to:

The Archivist
Archives and Chapter Library,
The Vicar’s Hall Undercroft
The Cloisters
Windsor Castle,
Windsor, England
SL4 1NJ

They prefer to receive such requests by mail.

Beryl Dean was such a remarkable and talented lady that I am surprised that no one has yet written her biography. This would be an excellent subject for a University Thesis.

Beryl Dean Windsor Castle

Beryl Dean Windsor Castle

24/09/2013 by Ann Bernard

Royal School of Needlework – Part 5: Extended

The earlier RSN post triggered many responses and more information which I am delighted to share with you.

Marion Scoular, who many of you know, and who was a student at RSN just after I left, tells me that the gown worn by the Queen for her Coronation, was not only designed by Norman Hartnell but was constructed and beaded in his workrooms. RSN did not do beadwork.

The train or robe was designed and stitched at RSN by their work room staff. It took 12 embroiderers 3500 hours of stitching to complete this, working round the clock from March to May. The cuttings from the velvet of the train were made into pin cushions and sold to the public. Does anyone happen to own one of these pincushions?

Queens Coronation

Queens Coronation

A further email from Debbie credits the National Trust for preserving Joan Lander’s embroidery and legacy.

Sue Jones of Shropshire tells me that she was fortunate to meet Joan Lander once or twice as an elderly lady. Joan was President of the local Embroiderer’s Guild. At one meeting where the speaker was dismissive of traditional embroidery skills, Joan got up and walked out. I do remember hearing about this at the time but did not then know who Joan Lander was. There was a time a few decades ago when embroidery was very experimental and people were not interested in traditional work. That time has passed and experimentation has become more moderate and the traditional skills are honoured. Sue comments that Joan’s embroidery was exquisite.

[do_widget id=arpw-widget-2]

I hope that the correct information plus this wonderful photo will set the record straight.

A future subject for this blog will be Leek Embroidery. If you have some information on this subject, I would appreciate receiving it so that the record here is as complete and accurate as is possible.

15/09/2013 by Ann Bernard

Royal School of Needlework – Part 5: We Hit the Jackpot!

Every now and again, the internet delivers a wonderful surprise. In early September, Debbie, who lives in Shropshire, England sent me a brief note saying she was able to identify the young lady who was stitching the GoldWork Sampler in the class photo at The Royal School of Needlework. Would I like to know her name?

I felt that I had won the pot of gold at the end of a treasure hunt. My profound thanks to Debbie for the initial information and then looking for more and sending me all that she found.

Stitcher Joan Lander

Stitcher Joan Lander

The young lady stitching that complex piece was Joan Lander. She was older than us teenagers having served as a nurse during World War lI and then started training at the Royal School of Needlework in 1947. At the time of the photograph she would have been in her last year of studies (see Blog entry of July 4, 2013).

Joan Lander’s family home was Sunnycroft. Wikipedia supplied the following history:

Located in the market town of Wellington, Shropshire, England, and owned by the National Trust as one of their more unusual properties.

Suburban villas were almost ‘country estates in miniature’ that attempted to emulate upper class mansions on a middle class budget. Many have either been modernized, renovated or refurbished out of recognition over the last 60 years or so or have been demolished and replaced with later housing, converted into offices or residential care homes, or have been broken up into flats and smaller residences.

Rare Survivor

Sunnycroft remains intact, complete with the original interior fixtures and fittings, many of which are still in place and therefore has a unique character and intimacy that is often lacking from larger properties but very evocative of its time and place.

Sunnycroft was built in 1880, and extended in 1899. Uniquely the house remained in the same family from its completion in 1899, until it was bequeathed to the National Trust in 1997.

The National Trust summarises Sunnycroft as:

A late 19th-century gentleman’s villa – typical creation of Victorian era suburbia
Rare unaltered interior, with an elaborate conservatory
A mini country-estate, with pigsties, stables, kitchen garden and orchards
Colourful borders and summertime flower displays
Superb long avenue of redwood trees and lime trees.

Visitors to the house will get an insight into some of the exquisite embroidery worn at Westminster Abbey and can browse through souvenir newspapers.
The ‘Thread Through History’ exhibition is housed in Miss Lander’s former bedroom and embroidery workshops are planned throughout the year.
Joan Lander travelled far and wide to teach embroidery and traded as Joan Lander Designs. She was awarded a gold medal by the Royal School of Needlework and held lessons around the dining room table at Sunnycroft.

Joan’s travels led her to collect all sorts of textiles and designs that inspired her work – including several pieces of Leek embroidery – providing a link with the likes of William Morris, who designed pieces for the Leek Embroidery School.

“Among the amazing collection we have also recently discovered what we think is the largest collection of Leek embroidery in the country.”

The fabulous colours of the silks and fabrics have been perfectly preserved through years of being hidden away in various pieces of furniture throughout the house.

National Trust curators and conservators have been delving in to cupboards and chests of drawers to create this fascinating new exhibition.

Joan worked on the embroidery of the Queen’s Purple Robe of Velvet at the 1953 coronation.

Leek Embroidery is William Morris Designs stitched with Silk Thread. I had never heard of it until now.

The following piece of embroidery is now owned by the National Trust. Designed and stitched by Joan while a student at RSN, it is probably her sampler of Laid Work. The appearance and the fact that it was stitched with silk threads leads me to that conclusion.

Stitcher Joan Lander Owner By National Trust

Stitcher Joan Lander Owner By National Trust

Joan Lander, bequeathed the house and estate to the National Trust. Realizing its historical value, she did not alter or modernize the house.

You will find a tour of some of the house, contents and the gardens on the following site:

http://www.flickr.com/groups/sunnycroftnt

There is a picture of the billiard table which she did not use for billiards but rather as a storage area for her embroidery supplies. There is only one photo of her embroidery on this site but her early RSN samplers would have been the same as mine.

I have also read that she also worked on the gown the Queen wore to her Coronation. She was chosen to be part of this team because of her exceptional skills particularly in GoldWork. From the wording, it is not clear if it was the gown or the velvet train she worked on but both were embroidered by the Royal School of Needlework.

Queens Coronation By Royal School of Needlework

Queens Coronation By Royal School of Needlework

Debbie thinks that Joan’s GoldWork sampler may be in a local church and hopes to be able to find it.

To add to this discovery, Debbie found a Pathe News Film dated 1951. It was taken at the Queen’s presentation of Diplomas to graduating students at the Royal School of Needlework. There is no sound track so here is a quick guide. I think that it was taken in the front office of the school’s property at Princes Gate. Everyone bows or curtseys to the Queen and then to the Princess Royal who is seated on the Queen’s right. The gentleman with the Queen is Earl Spencer, father of Princess Diana.

http://www.britishpathe.com/video/queen-elizabeth-at-needlework-exhibition/query/royal+school+of+needlework

The graduating students are, first, Joan Lander. She had won the Gold Medal as an excellent student. There is a bit of repetition and you will see her twice. The second lady, I do not know. The student second to last out of four (at 00:21) is myself!! Continue watching through the gentlemen receiving their honours. They were also graduates of RSN, presumably from the night school program as they were not among the day students. Following this, you will see the Queen touring the display of students’ work. She is accompanied by Joan and is looking at the sampler which I am sure that you will now recognize. I am standing in the doorway at the back. I was wearing a blue wool dress made by my mother from a Vogue pattern. Is not the Queen a truly beautiful woman with a wonderful smile!

[do_widget id=arpw-widget-2]

A link to another very short video of this momentous occasion was supplied by Claire Reeves of the National Trust. In this one, you will see more of the stitched samplers.

http://www.itnsource.com/en/shotlist/BHC_RTV/1951/12/24/BGU412150048/?s=Joan Lander

Notwithstanding Pathe’s assertion that the film dates from 1951, I think that it is more likely to be 1952. My recollection is that RSN did not have a presentation in ’51 because there were so few students actually graduating that year so the presentation of their certificates was postponed until ’52. But until I locate my Diploma, I cannot be sure of the date.

I do remember the day and receiving my Diploma from the Queen. I did not get a higher level Certificate as I had only been a student for 18 months and had not completed the three year course. But I worked as hard and as fast as I could and completed about 2 1/2 years worth of work.

Debbie happened to find my blog as she is interested in embroidery and has taken a course on Crewel Embroidery taught by RSN and presented in her neighbourhood. She is eager for there to be another course and hopes to have the time to attend. She sent me a photo of her project which is a real credit to her and I hope that she will be able to continue this interest.

I hope that you have enjoyed this blog entry as much as I have creating it.

09/09/2013 by Ann Bernard

Burden Stitch – Part Two: a Tutorial

If you are using Burden Stitch as part of a design, you will have already decided on how you plan to complete the surrounding areas. On this sample, which is going nowhere except onto this blog, I had to decide on completion. The decision was a solid blue background around the area on the right and a section without blue fabric on the left.

Burden Stitch Finishing Stages

Burden Stitch Finishing Stages

Burden Stitch Sinking The Thread Ends

Burden Stitch Sinking The Thread Ends

The next step was to sink, or plunge, the ends of gold thread in the left area. Make yourself a lasso using a length of Perle thread or DMC, fold it in half and thread the two thicknesses into the eye of a Chenille or Tapestry needle. Make a hole with your awl in the spot you wish to take the gold thread through to the reverse side of your fabric. The lasso goes into that hole. Place the far end of the gold thread into the loop of the lasso. Gently ease the lasso and the gold thread through to the reverse side of your work. If you catch the gold thread too close to the stitching, it will not go through the fabric smoothly, The gold wrap will get stripped off its core and you will be unhappy with it and probably have to restitch that row.

Burden Stitch Threading the Lasso

Burden Stitch Threading the Lasso

Lassoing /plunging can be useful in other situations. It can be used for starting a thread or finishing cord that is too thick to go though any needle. If you have reached the end of some stitching and the last bit of thread is too short to finish off normally, then lasso it to the reverse side of your embroidery. It can also be useful in weaving threads into the reverse side of your work.

For the covered area on the right, I also lassoed the gold thread but placed the holes away from the edge of the circle where they will be covered by the blue fabric. Then, using a length of dressmaking thread, I whip stitched the ends of these threads to the the backing fabric. I do not always do this but felt that securing them was necessary in order to maintain the correct alignment of the gold thread on the front of the work.

Burden Stitch From The Bottom

Burden Stitch From The Bottom

Next step was to couch a single line of gold thread to the left side of the circle. I tried using one thread of gold with six threads of DMC along side but the DMC has a lower profile and slid under the gold. Unsuccessful and abandoned.

The blue fabric is a sample of drapery fabric from my stash backed with one layer of felt. I trimmed the inner edge of the fabric to about 1/4″ and nicked it so that it would lie flat. Then I pinned it and basted it into position.

Burden Stitch Finished

Burden Stitch Finished

Using one thread of blue, I catch stitched around the inner edge of the blue fabric.

To complete the sample and to secure the blue fabric and felt to the background, I couched two threads of gold as a pair a specified distance from the inner edge. Once again, I used the reverse side of the very helpful business card to help me maintain an even distance from the edge.

And that is that. Completed. I hope that this tutorial has been helpful by taking the mystery out of working with this stitch and by making it simpler and less prone to hazard and unwelcome surprises.

[do_widget id=arpw-widget-2]

The Flying Horse is stitched in Burden Stitch which is used as a solid filling stitch. It is part of my Metal Thread Sampler from RSN. The photo is not as good as I would have wished because it was taken through glass. The framed sampler is too large and heavy to move easily so we used the available light in our hallway.

Flying Horse Burden Stitch

Flying Horse Burden Stitch

Wishing everyone Happy Stitching.

12/08/2013 by Ann Bernard

Royal School of Needlework – Part Four: Designing

Remembering is fun especially when there is someone else to share memories and add to them. I am indebted to Gillian Cox, now Creelman (the dark haired young lady, second from the right in the first class room photo in my July 4 posting). We were both very happy to learn professional techniques from the masters of the art of embroidery but neither of us was particularly happy to discover that, after learning the basics on established samplers, we were expected to design our subsequent pieces of embroidery. These included Long and Short Stitch, Laid Work, Black Work, Coarse and Fine Whitework and Gold Work. How this piece of vital information could have surprised me is now beyond my comprehension. From hindsight, I will also comment that it is hard to design for a technique about which you, as yet, know little or nothing. I still have a mental block about designing but have developed some coping skills.

To aid us in this endeavour, we spent Friday mornings sketching in the Victoria and Albert Museum, the Natural History Museum and, Gillian tells me, she also sketched in Kensington Gardens and Hyde Park but that was after I had left. She remembers, as do I, that passersby would comment on what we were doing as if we were not there or were stone deaf. I dutifully went to the museums and sketched bits of the Syon Cope and stuffed birds but had no idea why I was doing it.

Syon Cope

Syon Cope

The Syon Cope is one of England’s treasures. For those who do not know about this remarkable, large piece of embroidery, I will explain why. Made between 1300 and 1320, it is an example of the high degree of artistry and the use of the technique of Underside Couching. Commissioned by wealth it was made by professional stitchers in a workshop. The most expensive of materials was used and it was extremely labour intensive. Underside couching was a specialty of England and is known as Opus Anglicanum. The Syon Cope was taken out of England during the reign of Henry V111 for safe keeping and remained in France until the early 1900s when it was returned. This saved it because otherwise if would have been destroyed and the extensive amount of gold used in the gold thread would have been recycled into the Exchequer. I hope that this information is correct but you can read a lot more about it on the web. I missed the Syon cope when I visited the Victorian and Albert Museum on my last trip to England. The Information Stand that now stands in the main entry hall is not an aesthetic replacement.

[do_widget id=arpw-widget-2]

The result of being clueless was that when we got to the point of producing a design for the next technique, I was dumbfounded, speechless and without a thought or an idea in my head. Miss Randell coaxed me into some sort of a decision and a design for Regal Lilies using Long and Short Stitched stitched in wool emerged. I had never even seen a Regal Lily and I do not think that anyone else had either. Remember that London was bleak and grey at that time and even the basics of life were in short supply. Available flowers were only those hardy perennials that had survived the war years. My choice was governed by the dream of an unobtainable exotica and the colours. Even after the decision was made, side views and details were guess work. The shading was guided by Miss Randell without whom I would have been totally lost instead of only 98% lost. Now we can turn to Google Images and find a wealth of information and pictures on every subject possible.

Regal Lilies

Regal Lilies

I was interested to hear from Marion Scoular, who many of you will know, about her experience of RSN and design. She started her training two years after Gillian and myself. For her first year, Marguerite Randell was her teacher; the second year, Miss Randell moved to the workshop section and Beryl Dean became the senior teacher in the school. Beryl Dean was an RSN graduate but was also an accomplished artist and designer. She tried to change the curriculum and place more emphasis on design. However, the Board of Governors did not agree with her and she only taught there for one year. What a missed golden opportunity that was. Her work is amazing and well worth researching on the web.

Cope for Bishop of London

Cope for Bishop of London

When I look at the current RSN students’ gallery, I am totally amazed at the variety and ingenuity displayed. Their work is a lifetime different to anything we ever created.

www.royal-needlework.org.uk Gallery: Degree students work

04/07/2013 by Ann Bernard

Royal School of Needlework – Part Three

It is more than time to return to my account of being a student in the 1950s at the Royal School of Needlework. Part Two is dated March 25, 2013 and available for you to establish continuity.

On Friday, April 6, 1951, The Times Educational Supplement published a full page article called the Tradition of “Opus Anglicanum”. After a brief historical review, the article continues to describe the syllabus and experience of the course and then mentions employment opportunities. A press photographer took some photos and three were published. This first photo was not one of those published but is the only one that I have in my possession. Efforts to obtain better quality prints of the others have been unsuccessful so we have done the best we could with a scan of a 60 year old newspaper page.

Royal School of Needlework

Royal School of Needlework

This first photo was staged and is thus not a realistic scene. For instance, we did not sit in a row. The first stitcher on the right and the furthest stitcher were older and had started a few months before the other three of us. This is evident in that they are working on the third sampler which was Crewel work. The nearer of the two young ladies stitching their second sampler is Gillian Cox and to her right is Carmel Leibster. The student stitching the sampler loose in her hand is me. And no, I do not recognize myself either! Both Gillian and Carmel are stitching on their own frames while I was given the work of an unidentified student to give the photos more variety. In reality, I was at that time stitching the same sampler as Gillian and Carmel. And we all hated that tedious piece of applique on which we learned to stitch accurately and with totally even spacing. And we also learned to stitch fast. If you watch the videos made by Erica Wilson, you will see how quickly she works. Note that our trestles (or easels) are ancient. We stitched with our work covered (like a surgeon) and not uncovered as is indicated. Carmel’s protective cloths are folded and hanging on her trestle. Gillian has hers protecting the edge closest to her which is the part most likely to be snagged by leaning on it. Old white cotton sheeting is ideal for protection cloths. It does not need to have finished edges but it is desirable to launder them occasionally. Gillian now lives in the eastern USA, I am in Canada while Carmel remained in London. The parquet floor and panelled wall are original but the hot water radiator is probably a more recent addition as the house was built in the 1850s.

Royal School of Needlework Classroom

Royal School of Needlework Classroom

This is a general view of the classroom. Note that the students are sitting in a random manner, the normal layout. What is not normal and staged for the photographer is that the frames are uncovered. The student on the left is stitching on her goldwork sampler. Note how much larger is the frame and fabric when compared with our beginner samplers. Many types of embroidery can be rolled around the roller bar using extra fabric for padding and protection. Because of the padding within the motives and the desirability of not disturbing the gold thread in any way it is not possible to do this with goldwork hence the frame gets larger and larger.

Royal School of Needlework Student Working

Royal School of Needlework Student Working

A closer view of the student working on her goldwork sampler. All students first stitched the three emblems at the top – a pomegranate, crown and fleur de lys. The remaining three to six items on the sampler were our own design. This was a third year project and demanded a lot of time and skill to complete the technically demanding designs that we were inspired to create. Note the size of the frame and fabric when compared with our beginner samplers. She would have stitched the upper three motives with the extra fabric rolled onto the roller bar at the base of project. Having completed these, the fabric would have been unrolled giving access to the middle of the design. When that was completed she would have unrolled the rest of the design. Many types of completed embroidery can be rolled around the roller bar using extra fabric (such as sheeting) for padding and protection. It is not possible to do this with goldwork hence the frame gets larger and larger. Notice, too, that she has two spools of gold thread. Japanese gold is couched down in pairs. Having two spools means that the twist on both threads is the same allowing the gold thread to reflect light in the same way. As goldwork is all about light reflection this is the correct way to do this and it does make a difference to the finished piece. It would appear that she has included some silk shading in this dramatic and ambitious piece. I wish I knew her name.

Goldwork or Metal Thread Embroidery as it is often called, is a wonderful medium in which to work and I am glad that I had just enough time to include this in my studies. I do have my sampler but it is simple compared with the one in this photograph. I had three weeks to complete the whole thing before leaving to move on to college. It had to be simple and manageable in terms of the number of stitches needed. I love teaching goldwork though my students are encouraged to choose designs that are more contemporary than traditional. Even so, we all continue to use the techniques and skills that have been used since medieval times and even before. Goldwork had reached a high standard of technical expertise several centuries ago as is evident in Opus Anglicanum found in the Syon Cope and other works located in such places as Durham Cathedral and museums.

Royal School of Needlework Teacher and Student

Royal School of Needlework Teacher and Student

Our principal and senior teacher was Marguerite Randell. She is indicating a detail to the student who is one of our two older stitchers. Note that the protection cloths are hanging on her trestle and that she is stitching with one hand on the top surface and one underneath. Stitching this way is how the professionals do it and it helps with speed and accomplishing the project in a cost effective manner.

[do_widget id=arpw-widget-2]

Marguerite Randell (1881 – 1955) was a superb teacher. She wrote three very detailed books on stitching: Simple Embroidery, More Simple Embroidery and Plain Sewing. All were published by Cassell and Company, Limited. These small, thin books contain a mass of information with detailed and accurate diagrams. I recommend them to serious stitchers for whom accurate information is more important than beautiful colour photography. I have originals but they have been reprinted and are available through AbeBooks.com. 1952 was her last year of teaching after which she worked in the workroom on commission pieces. She seemed very elderly to us young ones and she certainly did work long after normal retirement age. She was a gentle and gracious lady who knew exactly how to do everything. Erica Wilson acknowledged her as “my first teacher, who knew more about needlework than anyone I’ve ever known – the late Marguerite Randell”.

Both Gillian Cox and myself echo this sentiment wholeheartedly.

  • 1
  • 2
  • Next Page »

Search

Recent Posts

  • Laid Work – Introduction.
  • How to stitch Snowdrops. Quick and Easy!
  • Inspirations, All Stitched Up! from Australia
  • Newsletter Märchenhaftes Sticken – Jessica Grimm
  • Cotton Quartet 1: Preliminaries & First Stitches

Recent Comments

  • Ann Bernard on Prepare your embroidery for the framers – Mount on Foam Core Board
  • SGibau on Prepare your embroidery for the framers – Mount on Foam Core Board
  • Louise Desmarais on Prepare your embroidery for the framers – Mount on Foam Core Board
  • Katherine & Malcolm Bell on Embroideries that Record History
    Queen Mary’s Carpet
  • Ann Bernard on Embroideries that Record History
    Queen Mary’s Carpet

Pretty Chic Theme By: Pretty Darn Cute Design