Stitching Idyllic

Stitching by Ann Bernard

  • Home
  • Blog
  • Spring Flowers
  • Summer Flowers
  • About Ann

January 31, 2019 by Ann Bernard

“If Winter comes, can Spring be far behind”.

This famous quote helps us through the depths of the winter weather.

To help both you and myself, let us anticipate spring.  It is bitterly cold here in southern Ontario.  Today looks lovely but it the cold goes right through even the warmest coat and gets into ones bones.

It is a day to stay indoors and dream of Spring Flowers.

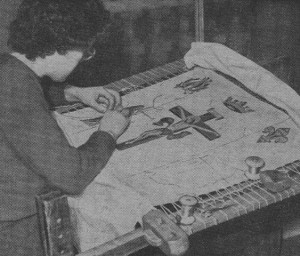
Here are some hand stitched spring flowers which are based on chain stitch.  It is amazing what one can do with the most basic and best known stitches if one plays around with them a little.   One never knows what will happen.  To achieve flowers that are  recognizable it is important that the proportion of plant height and flower size be correct and that the colours of both foliage and the flowers also be correct.  Otherwise, our eyes do not recognize them.  They become generic, rather than specific.

Snowdrops.  Except for celandines, these really are the first flower of spring.  One can have both snow and blooms in the same flower bed. Use a white Perlé thread to give the flowers some sparkle.  In nature, they really do sparkle.

Crocus also bloom in early spring.  DMC floss thread in the correct colours gives us a good rendition of these popular and fragile blooms.  Note that the foliage colour of all three plants is different.

Tulips are both taller and much later in the season.  These flowers bloom in a multitude of different colours.

My good friend, Mary, created card inserts using the instructions for tulips.  I would love to receive such a card for a birthday or to wish me well if I had been sick.  It is such a personal gift to, or from, someone important in ones life.

Enjoy a post from the past

  • Meet Adeline Atkins, artist and stitcher. This is a mysterious piece of embroidery.
    Adeline, if I may call her that, rather than Mrs Willian Roseborough, lived in Owen Sound which is a small …

You will find the instructions on how to stitch these flowers together with the DMC floss colour numbers in this ebook.

Hand Stitch Recognizable Spring Flowers published by ebookit.com

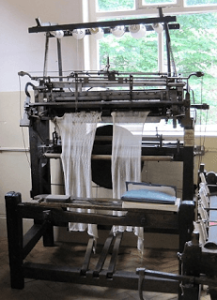
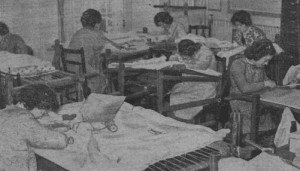
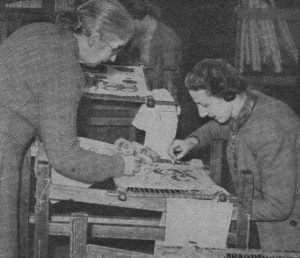
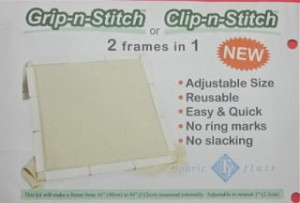
The book contains the instructions for 23 different flowers, bushes and trees.  It also contains, and this is important, information on setting up a frame with fabric that is taut.  Basic, ‘how to stitch’ information is included plus finishing and mounting ones completed work.  As most books assume that everyone knows the basics, they do not cover this vital information.  Because it is not widely know, I have included it in mine.  It saves beginning stitchers falling into  potholes and embroidery is full of them.  The experience is more enjoyable if one knows where the potholes are and is able to avoid them.

The book is published in ebook format because of the high cost of colour printing.  You can print it on your printer for your own personal use.  We have proved many times that the instructions are complete and you will not need other assistance.

Have fun with this and enjoy anticipating Spring.

Ann

ShareTweetGoogle +PinterestPocketMail

October 20, 2014 by Ann Bernard

From Lace Back to Stockings

The last posting on Lace triggered some interesting responses. Among them was the fact that a wedding dress was made of Nottingham Lace. Another reader wondered where one finds pieces of chunky old lace with which to play creatively. A third observed that the only place in the UK where lace continues to be manufactured is in Heanor in Derbyshire. And there was an email from Jeri Ames in Maine, USA with a request to share this blog with the members of Lace@Arachne.com.

That will be a pleasure and I hope that the lace makers will find this blog interesting though tangental. And for any readers with links to RSN in the 1950s, my name during my RSN days was Ann Nind. While a student there, I completed two and a half years of the three year course all in an 18 month time period. I worked hard for the first time on my life. It was a skill I really wanted to pursue but employment prospects were almost negligible. Hence the move into Occupational Therapy.

One never knows what will happen when one starts a blog. And it’s all rather exciting!

Lace is a huge subject and my blog barely scratches the surface. Further information on the history of Lace can be found in the article Lace by Sheila A. Mason, BA, FRSA. www.nottsheritagegateway.org.uk

Machine knitting was invented about 1589 by William Lee, a vicar of Nottinghamshire. The Stocking Knitting Frame made it possible for workers to produce knitted goods up to 100 times faster than by hand. The industry was primarily based in Nottinghamshire, Leicestershire and Derbyshire. The workers required quick sight, a ready hand and retentive faculties. It was a hard and demanding way to earn a living. Queen Elizabeth 1 refused to grant Lee a licence to produce stockings as she feared that it would result in financial hardship for the hand knitters. He went to France where he and his brother developed the machine further and within a decade he was able to produce long silk stockings for the gentry. Prior to this, stockings were hand knitted at home by every person available much like the production of Dorset Buttons.
www.frameworkknittersmuseum.org.uk

I am reminded of Malvolio in Twelfth Night written by Shakespeare 1601/02. By then, his yellow stockings had become a fashion item and it did not take long for them to become established. The cross gartering was not so normal! White was the usual colour and stockings were made of wool or cotton with silk being the most expensive. Fashion dictated colour changes and the inclusion of designs such as clocking as the machines became ever more complex.

The hand operated stocking knitting frames were an integral part of a cottage industry in the homes and cottages of Nottingham. A good light was essential and the high set wide windows in the photograph below indicates that a knitting machine was installed in the upper rooms. It was a family occupation. The men operated the knitting machine, the women did the sewing up and the children wound the hanks of wool onto cones. The machines became better, larger and faster. The industry boomed. The hand operated Stocking Knitting Machine depicted below is very different to the complex machine being demonstrated in the video at the end of this entry,

These four cottages in Stapleford near Nottingham were purpose built for the home based stocking frame knitters. The large windows on the top floor let in as much daylight as possible. In 1844 there were 16,382 stocking frames in the area. But the home industry was in decline because the availability of steam power made it increasingly attractive for the industry to move into factories. As a result, many of the machines in the homes fell idle and the welfare of the workers deteriorated. To earn the same money, the worker now had to toil 16 hours a day whereas previously he worked 10 hours. Their living conditions became deplorable with a diet consisting mainly of bread, cheese, gruel and tea on which they grew emaciated, pale and thin. As you will see in the video, operating a machine by hand requires strength and coordination.

This photo and the information were found in a wonderful collection of pictures: English Cottages by Tony Evans and Candida Lycett Green, ISBN 0 297 78116 2.

As the 19th century progressed, fashions changed. Men wore trousers and no longer needed long stockings. In the years from the 16th century to the 19th century it became harder and harder to make a living from operating a knitting machine. This is a brief synopsis from a long and informative article at
www.picturethepast.org.uk

Enjoy a post from the past

  • Introducing free-style, creative Contemporary Embroidery
    My thanks to the multitude of you who read the series of 12 blog entries on Embroideries That Record History. …

A Google search of Framework Knitting Machines will lead you to YouTube videos of these machines in operation. You will notice that working the 100 year old machine requires good body strength and concentration. The knitter, Martin Green, can be seen in the following video which includes an explanatory soundtrack.

https://www.youtube.com/watch?v=oWfzzfjMa6k
The beautiful lace shawl pictured at the end of one of the videos reminded me that I have a similar shawl given to me by an English friend on the occasion of the birth of our first child. It is like gossamer and is in excellent condition because it has been treated as a treasure.

I hope that you have enjoyed this brief trip into the Land of Lace.

ShareTweetGoogle +PinterestPocketMail

July 21, 2013 by Ann Bernard

Trestles or Easels Specifications

Trestles or Easels can be made at home if you have the tools. They are an effective support for large sized rectangular or square stitching frames and for slate frames. Mine were made in a long time ago by the staff and patients in a chronic care hospital. At that time, although I knew what I wanted, I could supply neither picture nor measurements but they turned to be perfect. I will add as many photos as possible so that you can see how they are constructed and you can alter the construction as you wish. I was 5’8” tall at the time, somewhat less now, but the size continues to be satisfactory.

1) The uprights and lower cross bars are 2″ square lumber which is the finished size. The edges are bevelled and well sanded.
2) The front post is 29″ high and the back post is 31″ high. The lower cross bar is 30″ long and the lower edge is 9″ above the top of the foot.

Easels Specifications Side View

Easels Specifications Side View

3) The upper end of the front and back posts have a trough chiselled into them all of which are 2″ deep and 3/4″ wide. It would be preferable if they were 1″ wide in that the upper cross bars would not then be wedged in place.
4) The upper cross bars are placed within these troughs and they support the stitching frame itself. They are made of a wood that does not warp and are 3/4″ wide, 3/4″ inch deep and 37″ long. The sloped surface for the frame is efficient and comfortable for stitching.
5) The feet are each 12″ long and 1 1/2″ wide. Each of them has two extra pieces of thin wood added to their under surface to lift them off the ground a little and to level them. They are stable on carpet.

Easels Specifications End View

Easels Specifications End View

6) To return to the upper cross bars, at RSN these were thin pieces of wood like haberdashery yardsticks. The outer ends had holes drilled in them at regular intervals. The sides of the troughs in the uprights also had holes drilled into them. A cotter pin could be placed through the three holes thus allowing for the upper cross bars to be height adjustable. The cotter pins were tied to the trestles with string preventing them from being frequently lost!!

Easels Specifications Cross Bar

Easels Specifications Cross Bar

Easels Specifications Full View

Easels Specifications Full View

7) The front support for the stitching framed is 3/4″ wide, 1/2″deep and 42″ long. This is really longer than is necessary and it is likely something shorter would suffice here. Though, if your frame was really wide you would need longer support bars to accommodate the width.
8) The lower cross bars are held in place by a long screw, washers and a wing nut. The wing nuts are on the outside of the frame where there is no question of scraping a leg on them. This means that the frames could be dismantled but I have never done this.
9) The wood has never had any finish put on it. I wipe it with a damp cloth occasionally.
10) Then I added a couple of extra items which I find to be really useful.

The first is the addition of a piece of old lumber that is 8″ wide, 3/4″ thick and 33″ long. I place it across the far end of the trestles/easels where it serves as a shelf and supports the far side of the frame. On it I place a stitching light. I have one with two adjustable arms with a light shade and bulb on each arm. One arm has a Daylight bulb in it and the other has a regular 100 watt bulb. The dual bulbs eradicate shadows and give me a good working light. This light fixture is decades old and you might now need two separate lights for the same benefit.

Supplies and tools can live on this shelf where they are handy but not in the way. It would be even better if the shelf was covered with a non slip surface such as felt.

The second addition is an electric socket attached to one of the upright posts. This means that the cord for the table lights does not get pulled and that I can attach the whole setup to an extension cord. I sit on a comfortable, height adjustable office chair with good back support but without arm rests. A footstool adds to comfort and eases any pressure on the nerves and circulation in the back of the leg. I find this whole set up to be extremely satisfactory and very comfortable. We have cats and they can decide that my stitching frame is a comfortable place for a nap. I place crossed yardsticks on top of the covered (using a towel or sheeting) surface of my stitching. This seems to be an adequate deterrent.

If you would rather purchase trestles/easels already made, Mary Corbet knows of a supplier.

Enjoy a post from the past

  • Inspirations, All Stitched Up! from Australia
    Hello Stitchers. Today, I am a day late.  Inspirations, All Stitched Up! is a newsletter, as distinct to their Magazine, …

If you visit the following website, the Unbroken Thread by Kathy, you will find an entry in the Older Entries entitled Friends at RSN. The fifth photo in this entry shows the details of modern easels. You will notice that the front posts are high and are drilled to allow for height adjustment. This is not necessary if you will be the only person using the trestles. You will also notice that the frame is placed directly on the side bars without the addition of the far shelf for a light and tools and also without that front bar that supports the edge of the stitching frame that is nearest to you. This means that the width of the setup is controlled by the width of your stitching frame. With the addition of the front bar allows the space to be as wide as you wish or is convenient for you.

http://www.theunbrokenthread.com/blog/

And one final photo which I hope will explain everything!

Easels Specifications Finished

Easels Specifications Finished

Have fun and wishing you Happy Stitching.

Please email me if you have questions or comments.

ShareTweetGoogle +PinterestPocketMail

July 4, 2013 by Ann Bernard

Royal School of Needlework – Part Three

It is more than time to return to my account of being a student in the 1950s at the Royal School of Needlework. Part Two is dated March 25, 2013 and available for you to establish continuity.

On Friday, April 6, 1951, The Times Educational Supplement published a full page article called the Tradition of “Opus Anglicanum”. After a brief historical review, the article continues to describe the syllabus and experience of the course and then mentions employment opportunities. A press photographer took some photos and three were published. This first photo was not one of those published but is the only one that I have in my possession. Efforts to obtain better quality prints of the others have been unsuccessful so we have done the best we could with a scan of a 60 year old newspaper page.

Royal School of Needlework

Royal School of Needlework

This first photo was staged and is thus not a realistic scene. For instance, we did not sit in a row. The first stitcher on the right and the furthest stitcher were older and had started a few months before the other three of us. This is evident in that they are working on the third sampler which was Crewel work. The nearer of the two young ladies stitching their second sampler is Gillian Cox and to her right is Carmel Leibster. The student stitching the sampler loose in her hand is me. And no, I do not recognize myself either! Both Gillian and Carmel are stitching on their own frames while I was given the work of an unidentified student to give the photos more variety. In reality, I was at that time stitching the same sampler as Gillian and Carmel. And we all hated that tedious piece of applique on which we learned to stitch accurately and with totally even spacing. And we also learned to stitch fast. If you watch the videos made by Erica Wilson, you will see how quickly she works. Note that our trestles (or easels) are ancient. We stitched with our work covered (like a surgeon) and not uncovered as is indicated. Carmel’s protective cloths are folded and hanging on her trestle. Gillian has hers protecting the edge closest to her which is the part most likely to be snagged by leaning on it. Old white cotton sheeting is ideal for protection cloths. It does not need to have finished edges but it is desirable to launder them occasionally. Gillian now lives in the eastern USA, I am in Canada while Carmel remained in London. The parquet floor and panelled wall are original but the hot water radiator is probably a more recent addition as the house was built in the 1850s.

Royal School of Needlework Classroom

Royal School of Needlework Classroom

This is a general view of the classroom. Note that the students are sitting in a random manner, the normal layout. What is not normal and staged for the photographer is that the frames are uncovered. The student on the left is stitching on her goldwork sampler. Note how much larger is the frame and fabric when compared with our beginner samplers. Many types of embroidery can be rolled around the roller bar using extra fabric for padding and protection. Because of the padding within the motives and the desirability of not disturbing the gold thread in any way it is not possible to do this with goldwork hence the frame gets larger and larger.

Royal School of Needlework Student Working

Royal School of Needlework Student Working

A closer view of the student working on her goldwork sampler. All students first stitched the three emblems at the top – a pomegranate, crown and fleur de lys. The remaining three to six items on the sampler were our own design. This was a third year project and demanded a lot of time and skill to complete the technically demanding designs that we were inspired to create. Note the size of the frame and fabric when compared with our beginner samplers. She would have stitched the upper three motives with the extra fabric rolled onto the roller bar at the base of project. Having completed these, the fabric would have been unrolled giving access to the middle of the design. When that was completed she would have unrolled the rest of the design. Many types of completed embroidery can be rolled around the roller bar using extra fabric (such as sheeting) for padding and protection. It is not possible to do this with goldwork hence the frame gets larger and larger. Notice, too, that she has two spools of gold thread. Japanese gold is couched down in pairs. Having two spools means that the twist on both threads is the same allowing the gold thread to reflect light in the same way. As goldwork is all about light reflection this is the correct way to do this and it does make a difference to the finished piece. It would appear that she has included some silk shading in this dramatic and ambitious piece. I wish I knew her name.

Goldwork or Metal Thread Embroidery as it is often called, is a wonderful medium in which to work and I am glad that I had just enough time to include this in my studies. I do have my sampler but it is simple compared with the one in this photograph. I had three weeks to complete the whole thing before leaving to move on to college. It had to be simple and manageable in terms of the number of stitches needed. I love teaching goldwork though my students are encouraged to choose designs that are more contemporary than traditional. Even so, we all continue to use the techniques and skills that have been used since medieval times and even before. Goldwork had reached a high standard of technical expertise several centuries ago as is evident in Opus Anglicanum found in the Syon Cope and other works located in such places as Durham Cathedral and museums.

Royal School of Needlework Teacher and Student

Royal School of Needlework Teacher and Student

Our principal and senior teacher was Marguerite Randell. She is indicating a detail to the student who is one of our two older stitchers. Note that the protection cloths are hanging on her trestle and that she is stitching with one hand on the top surface and one underneath. Stitching this way is how the professionals do it and it helps with speed and accomplishing the project in a cost effective manner.

Enjoy a post from the past

  • The very first type of embroidery – ever
    Would you believe that the first type of embroidery that was ever created was……….wait for it………….Needle Weaving!!  It happened many …

Marguerite Randell (1881 – 1955) was a superb teacher. She wrote three very detailed books on stitching: Simple Embroidery, More Simple Embroidery and Plain Sewing. All were published by Cassell and Company, Limited. These small, thin books contain a mass of information with detailed and accurate diagrams. I recommend them to serious stitchers for whom accurate information is more important than beautiful colour photography. I have originals but they have been reprinted and are available through AbeBooks.com. 1952 was her last year of teaching after which she worked in the workroom on commission pieces. She seemed very elderly to us young ones and she certainly did work long after normal retirement age. She was a gentle and gracious lady who knew exactly how to do everything. Erica Wilson acknowledged her as “my first teacher, who knew more about needlework than anyone I’ve ever known – the late Marguerite Randell”.

Both Gillian Cox and myself echo this sentiment wholeheartedly.

ShareTweetGoogle +PinterestPocketMail

April 11, 2013 by Ann Bernard

An Antique Standing Frame and Protecting Your Embroidery

In the 1940’s, I inherited an antique embroidery frame. Probably made in the late 1700’s, the roller bars are 36″ long and the vertical posts are 32″ high. The frame will pivot on the hinge at the top of the vertical posts allowing the frame to be tilted to a comfortable angle for stitching. The fabric to be embroidered is stitched to the edge of the tape on the roller bars and then lashed to the side bars with string in the same manner as setting up a slate frame. Although I have not used it very much, it has been used extensively in the past. This is evident as this is the third tape replacement. It was used to stitch English Country Garden and, currently, to assemble Creative use of Stitches.

Antique Standing Frame

Antique Standing Frame

When embroidering on fabric mounted on a standing frame, a slate frame on trestles or using a stretcher bar frame supported by the edge of table, the following procedure is recommended to keep your embroidery both clean and undamaged during stitching. This is how the professionals do it.

First, place clean white cotton fabric on the surface of your fabric for embroidery and roll both of them together around the roller bars. If your piece of embroidery is too wide for you to be able to reach the centre comfortably while stitching, this is how it is narrowed enough for it to be functional. You will have deduced that an unstitched section is rolled onto the rollers initially and that later, the completed part is rolled onto the other roller exposing the unstitched section. The completed portion in particular needs this protection.

While actually stitching on embroidery mounted on a standing frame, a slate frame or a stretcher bar frame, I always protect both fabric and completed stitching in the following manner. Place one or more pieces of clean white or pastel coloured cotton or pillow cases over the fabric on the frame.

Enjoy a post from the past

  • The Lisbon Treaty as printed here, recanted.
    Apologies my friends.  I gather that the interpretation of the Lisbon Treaty I circulated is a scam.  False and unnecessary information. The …
Protecting Your Stitching

Protecting Your Stitching

And here are the reasons:

Protection from you
1) Protects your completed area of your embroidery
2) Prevents any wear from your arm resting on the embroidery
3) Prevents thread snags from buttons, a watch strap, rings or bracelets
4) Prevents any grease or oil from your skin getting onto the embroidery

Convenience for you
5) Provides a convenient place upon which to keep threads and stitching equipment
6) Helps to locate needed items which tend to get lost on the stitched surface
7) Ability to lift the cover with threads and tools off easily thus keeping them together
8) Covers completed work allowing you to focus on the section you are working on
9) The cotton surface feels cool and comfortable under your forearm

Protection from others
10) Keeps pets off your work
11) Prevents others from touching unless you are there showing it to them
When not stitching
12) Cover the whole setup with a large piece of clean cloth or a towel
13) When you return, nothing will have been disturbed
14) If you are away from your work for a period of time, it is a dust excluder
15) Habit

Protecting When Not Stitching

Protecting When Not Stitching

The frame is light and I can hook my foot under the base bar and move it right or left thus repositioning the stitching for easy access. Or, when necessary, I can sit at the end of the frame. I use a height adjustable office chair with good back support.

There is a delay in researching and writing about the student experience at RSN. RSN is trying to find for me some specific 1951 press photos and this may take some time. The story will continue as soon as possible.

ShareTweetGoogle +PinterestPocketMail

February 22, 2013 by Ann Bernard

Grip-n-Stitch Embroidery Frames by Fabric Flair

Sharon Boggon purchased a Grip-n-Stitch Frame in Australia in 2012 and wrote a review about it. This new type of embroidery frame sounded like an improvement on other frames on the market and I have been searching for one in Canada. No luck in our stores but Herrschners have them in their online catalogue. The size is 8″ x 10″ with four small extensions included to enlarge the frame in any direction. For a larger frame it is necessary to purchase two kits.

Grip-N-Stitch Frame

Grip-N-Stitch Frame

I tried it out on a piece of cotton fabric (Monaco) by CharlesCraft, 28 count, to which I did not add backing. Currently, I am stitching on dressmaking weight linen to which I have added a light weight backing. As the teeth that secure the fabric are only 1/4″ long this is a about the limit to the thickness of the fabric that one can use on this frame. Aida Cloth would probably be OK but I have not tried this.

Grip-N-Stitch Mounting Fabric

Grip-N-Stitch Mounting Fabric

On the plus side, it is easy to mount the fabric on the frame single handed and the tension on the fabric is maintained well. This maintenance of tension is an improvement on a circular frame even with a wrapped inner ring or a Q Snap Frame. I have now used the Grip-n-Stitch Frame three times and found that it is light and comfortable to use, holds the fabric tension well and is easy and quick to set up. It needs less extra fabric around the outside of the frame than does a Q Snap Frame. As the fabric I was using softened a bit during stitching, removing the protective bars and tightening the fabric was easily and quickly done establishing drum tight fabric tension. I just hate stitching on fabric that moves with every stitch.

Enjoy a post from the past

  • Early Jacobean Embroidery Crewel Work Sampler
    Before getting into the Jacobean Embroidery, I thought you would like to see this piece of embroidery. It is labelled …

When the extra pieces of frame were added to form a square, it was an appropriate frame for stitching a circular design 8” in diameter. Set up as a rectangular frame, the design should be a little smaller than can be drawn on a sheet of computer paper. The whole of your design must fit within the frame. It is not possible to move it to a different part of the design as the teeth damage the fabric and would have a disastrous effect on your embroidery.

Grip-n-Stitch Embroidery Frames are a good idea but a version with longer teeth is needed to hold heavier or thicker fabrics. The cost was $56.00 Canadian which included shipping and taxes. I am including the link to Sharon’s review which includes more photographs. I have not been asked to write this review and purchased my frame from a commercial supplier.

Sharon Boggon also uses this frame for Crazy Quilting and reviewed it on February 20, 2013 and August 22, 2012:pintangle.com

Grip-N-Stitch Unboxing

Grip-N-Stitch Unboxing

Fabric Flair Associated Products can be found at:www.fabricflair.com

ShareTweetGoogle +PinterestPocketMail

Search the web site

stay up to date. Subscribe to our newsletter!

Name

Email


Connect with us socially

  • Facebook
  • Twitter
  • Instagram
  • Pinterest
  • RSS Feed

Hand Stitch Recognizable Spring Flowers Ebook

Stitching Spring Flowers

Hand Stitch Recognizable Summer Flowers

Stitching Summer Flowers

Recent Posts

  • Inspirations, All Stitched Up! from Australia
  • Newsletter Märchenhaftes Sticken – Jessica Grimm
  • Cotton Quartet 1: Preliminaries & First Stitches
  • Hand and Lock. London Craft Week. May 9 -15 2022
  • LONDON CRAFT WEEK 9 – 15 May 2022. Hand and Lock.

Recent Comments

  • Ann Bernard on September 20, 1066 The Battle of Fulford Gate
  • Mrs M Moverley on September 20, 1066 The Battle of Fulford Gate
  • Kathleen (Kate) Simeri on Stitches Sampler from The Royal School of Needlework
  • Ann Bernard on The Changi Quilts
  • Ann Bernard on Burden Stitch – Part One: a Tutorial

Archives

  • May 2022
  • April 2022
  • March 2021
  • February 2021
  • November 2020
  • October 2020
  • June 2020
  • May 2020
  • April 2020
  • March 2020
  • February 2020
  • January 2020
  • December 2019
  • November 2019
  • October 2019
  • September 2019
  • August 2019
  • July 2019
  • June 2019
  • April 2019
  • February 2019
  • January 2019
  • December 2018
  • November 2018
  • October 2018
  • September 2018
  • August 2018
  • July 2018
  • June 2018
  • May 2018
  • April 2018
  • March 2018
  • February 2018
  • December 2017
  • November 2017
  • July 2017
  • June 2017
  • May 2016
  • February 2016
  • January 2016
  • November 2015
  • June 2015
  • March 2015
  • January 2015
  • December 2014
  • October 2014
  • September 2014
  • May 2014
  • March 2014
  • February 2014
  • January 2014
  • November 2013
  • September 2013
  • August 2013
  • July 2013
  • June 2013
  • May 2013
  • April 2013
  • March 2013
  • February 2013
  • January 2013
  • December 2012
  • November 2012
  • October 2012
  • September 2012

Categories

  • Royal School Of Needlework
  • Stitching Colleagues
  • Stitching Equipment
  • Stitching History
  • Stitching Materials
  • Stitching Techniques
  • Stitching Tutorials
  • Uncategorized

Tag Cloud

Acid Damage And Mounting Canada 150 Chain Stitch Coral Stitch Couched Thread Crewel Designs Cross Stitch East India Company embroidery Jacobean Period Stitching Mary Corbet Masonite Medici Wool Queen Mary RSN Student Shading In Stitching Stem Stitch stitching Water Damage Stitching Worsted Wool Thread

Pretty Chic Theme By: Pretty Darn Cute Design