Stitching Idyllic

Stitching Idyllic by Ann Bernard

  • Home
  • Blog
  • Spring Flowers
  • Summer Flowers
  • About Ann

Archives for December 2017

21/12/2017 by Ann Bernard

Yet more gardens!

This stitcher is a long time quilter and had never hand stitched anything other than a kit previous to this garden. She loved stitching the tree and the tulips and added the rocks to ground some of the plants. She loved the dandelions so included those.

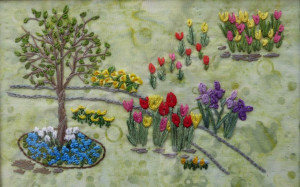
A garden with promise: stitched by Josie Abel

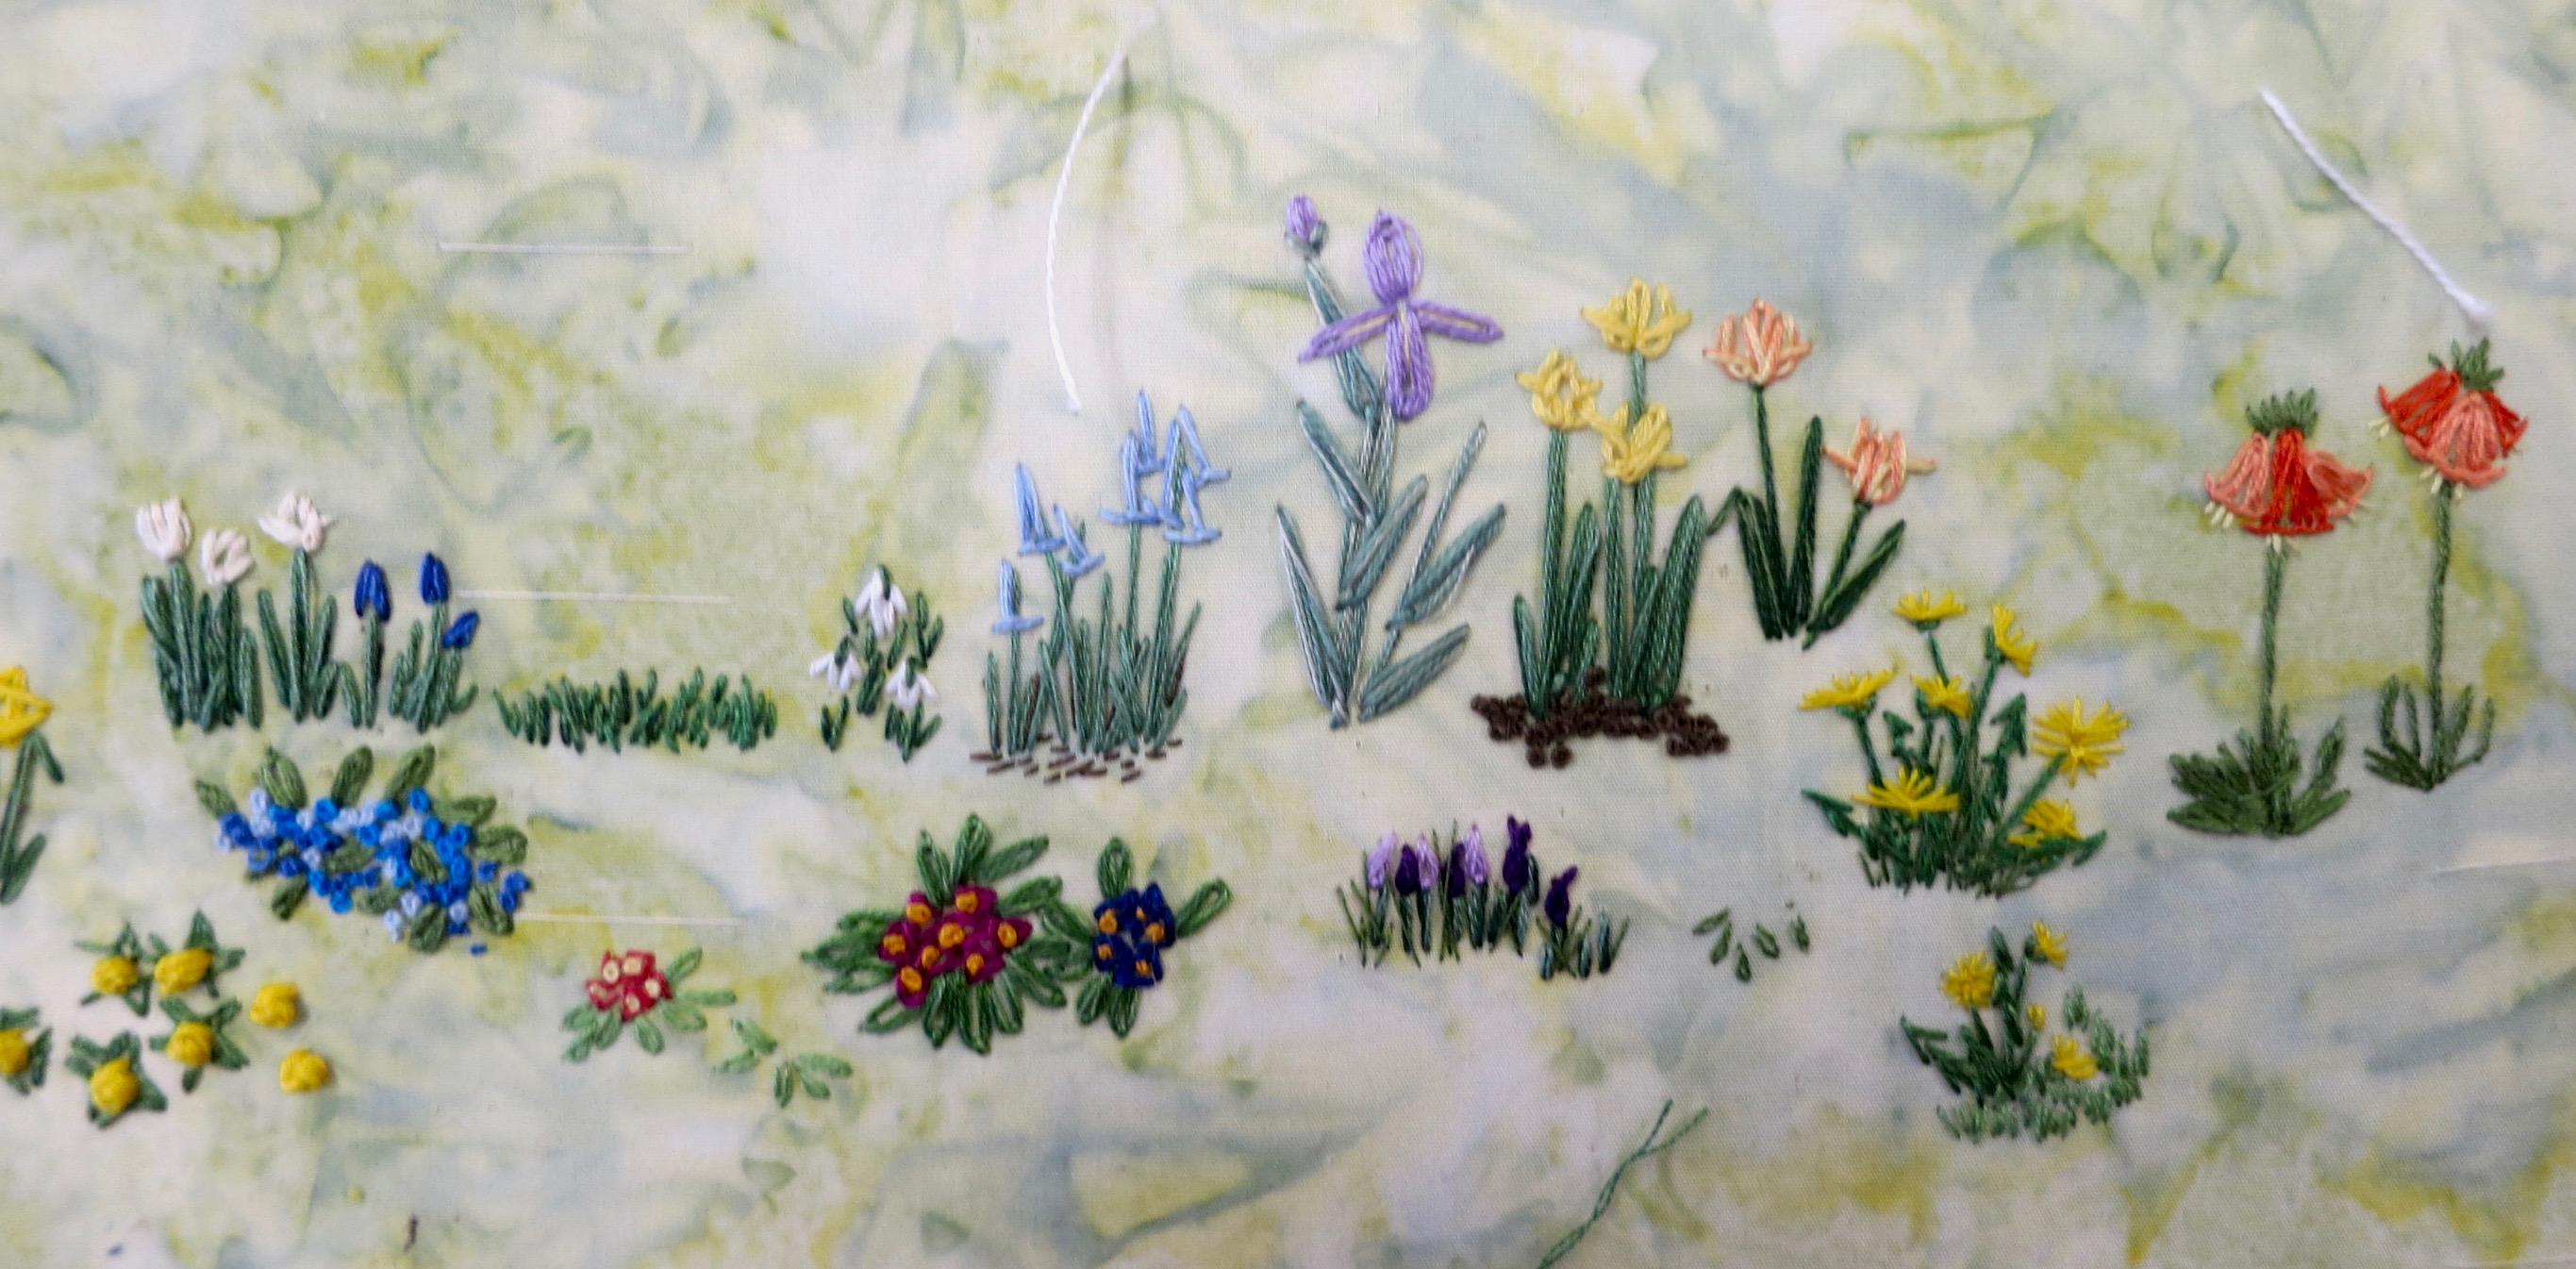
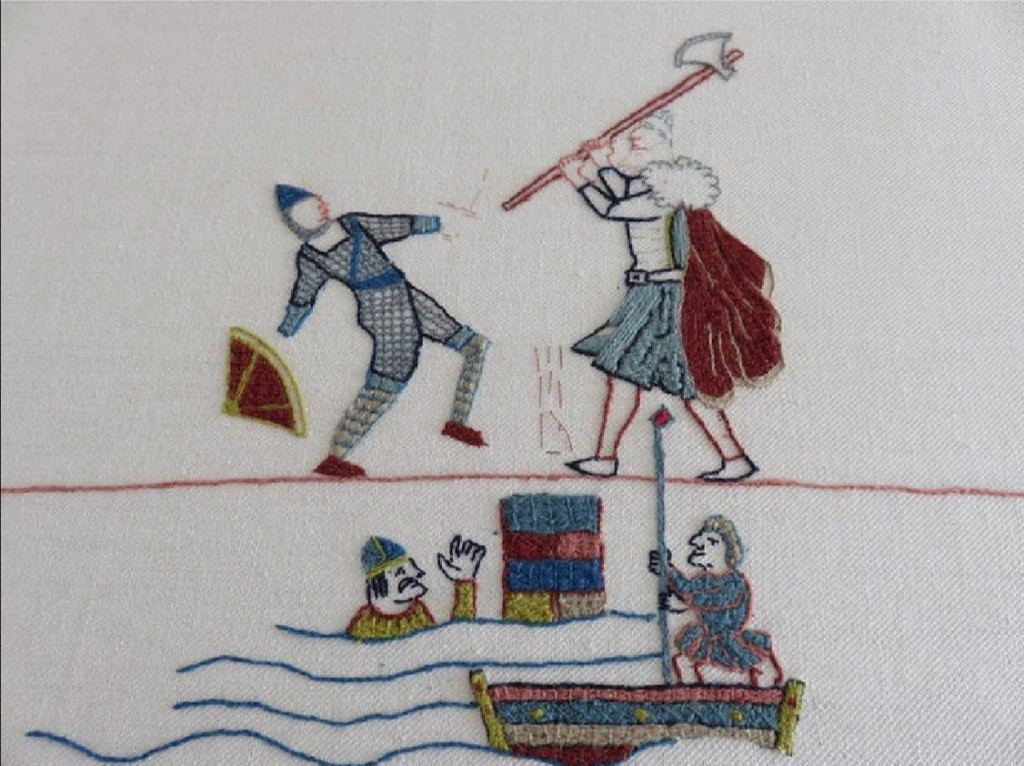
Edna is new to stitching so she is also new to creative stitching. This is a most successful path with a lot to look at on both sides. Her primulas and forsythias are very successful. Her next, current, project is also creative being designed by herself. It appears that Edna has bypassed kits and printed designs completely and has become an ‘original concept’ embroiderer.

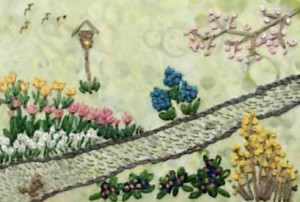
Action! Action! Birds in the sky: stitched by Edna Miller

[do_widget id=arpw-widget-2]

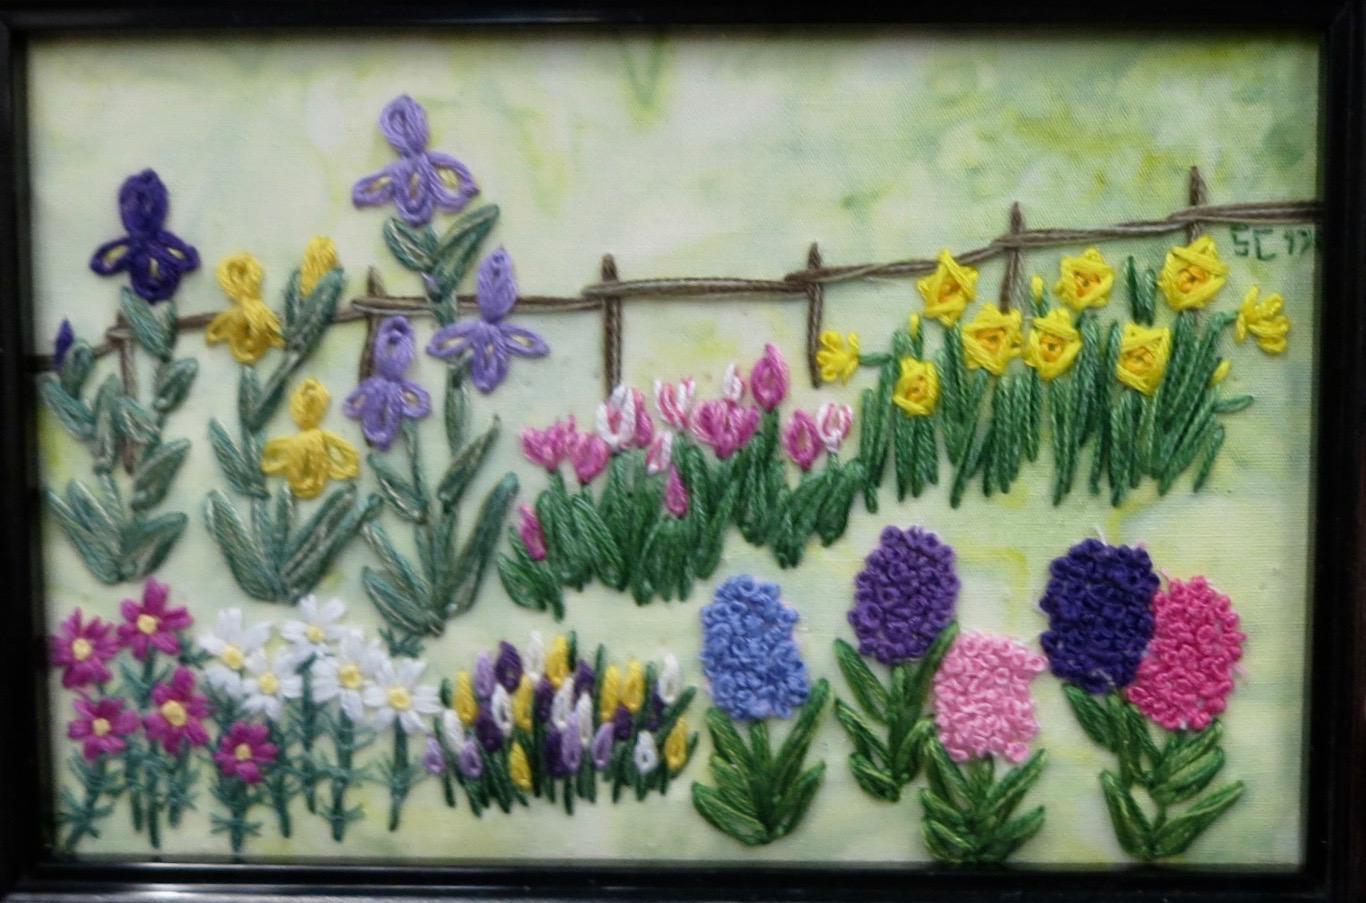
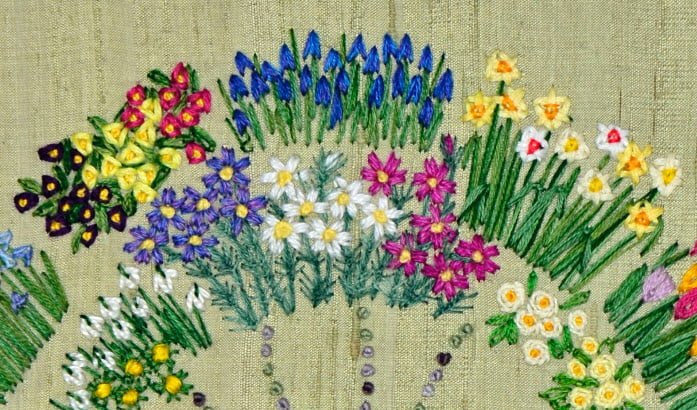
Pat started with the fence and distant trees. The flowers were added from the top down to the front. One has to look at this garden carefully as there is a lot to see. As you look and identify the flowers you will see small extra ones tucked into unexpected places. Pat is now an experienced stitcher. Other pieces of her work are included in Hand Stitch Recognizable Summer Flowers.

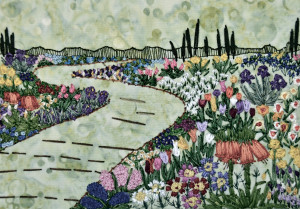
My Garden of Eden: stitched by Pat Harwood

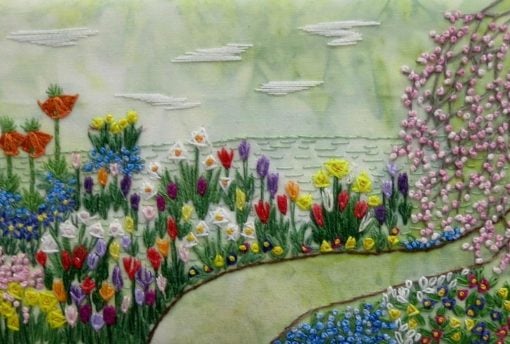
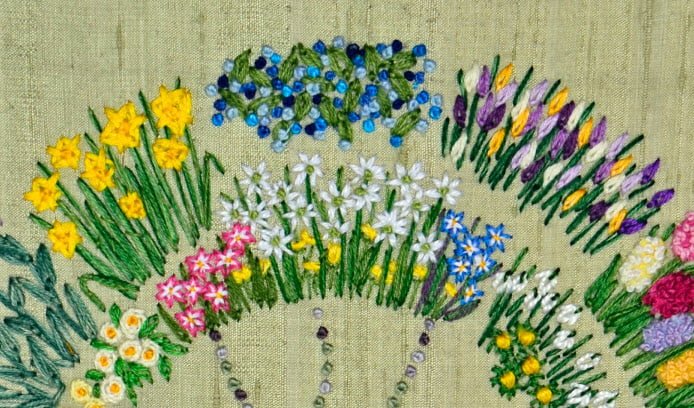
Joan is a most creative lady as can be seen by her interpretation of a garden. It is completely different in every possible way. It features wisteria, magnolia, wild grasses snowdrops and grape hyacinths. This piece is a tribute to the physical challenges Joan battles with dedication and determination every day of the year.

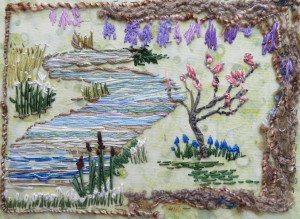
The River of Life: stitched by Joan Prowse

18/12/2017 by Ann Bernard

More Spring Gardens all stitched by students

More Spring Gardens all stitched by students

Pathways have been popular lately as you will see in the following gardens. Judy has been a machine embroiderer and quilter for years but has taken up hand embroidery in the last 5 years. It could have been difficult but Judy had no trouble with this concept and the variations on basic stitches. I am sure you can recognise the flowers but note the colour triangulation which gives the layout balance and harmony. The tree is the weeping flowering crab tree she has in her front garden.

My garden is full of bloom: stitched by Judy Eckhardt

Everyone in the classes stitched a sampler. Although this method of stitching flowers is easy, it is also a totally new way of portraying flowers. Having tried out all the plants and trees, the stitcher is familiar with the variations of the four basic stitches. They are then able to make a personal choice on which plants they prefer to include in their garden. The individual choices are infinitely varied but all work well. Unpicking is minimal to rare when the learning is done on a sampler.

All the flowers in this piece are well stitched with successful attention to triangulation of colour. If you are not familiar with this, a composition works better if each of the colours is included three times in a triangular layout. The fence is a successful unifying feature.

The garden by the fence: stitched by Sharon Craven

Here is one of the young stitchers featured in Hand Stitch Recognizable Spring Flowers. She is now 5 years old and graduating from Kindergarten. She is very proud of her garden as was her teacher.

Well done young lady.

[do_widget id=arpw-widget-2]

This is an example on how to use the information to create an original composition that is not a garden. There a many other examples included in the book. Elfrieda loved the information on stitching primulas and thought that they would work well in this layout. She also loved the dandelions so included a few of them. This an unique rendition of the information. She plans to use this for a book or phone cover.

Primulas and dandelions: stitched by Elfreida Janzen

There will be more gardens in a future posting.

17/12/2017 by Ann Bernard

Cover for Hand Stitch Recognizable Spring Flowers – 2nd edition.

You may not be aware of the new edition of this book on embroidery as my website has been inactive for much of last year. The timing of this information is to help you with your Christmas shopping. It is a great gift for any stitcher. It contains basic and necessary information from a professional such as; how to thread a needle easily, start and finish threads, set up fabric with a tight tension. There are many tips and strategies to help you enjoy stitching and achieve more professional results. It is also a creative text for those who prefer to do their own thing rather than follow kits and charts.

The title is the introduction. With a total of 17 flowers to be included the first consideration was that the cover would not look like a jungle. A definite structure was necessary to keep all the plants/flowers organized.

The outer circle contains the flowers featured in the first book which is no longer available. The inner circle features those that were added for the second edition and are less well known. The bushes and trees are still in the book but are not included in this cover embroidery.

Starting at the top of the outer circle, you will see white snowdrops. To the right are bluebells, primulas and grape hyacinths. Next are narcissi, tulips with hyacinths at the bottom. Following up the left side are tall iris, daffodils, and forget me nots. Lastly are crocus and more hyacinths.

The inner circle of spring flowers are less well known and are new for the 2nd edition. These photos have been enhanced so that you can see the detail of the original and the new flowers more clearly. The colour of the fabric is inaccurate.

At the top there are dark blue and mauve dwarf or rock iris. To the right are some more snowdrops with yellow aconites.

After that blue/mauve, white and pink/mauve pasque flowers or prairie crocus. Next are cream and pale yellow english primroses..

At the lower edge of the inner ring are a wilder variety of primulas in shades of blue followed but more english primroses.

Pink, white and blue star of bethlehem include dandelions growing among them. More snowdrops and aconites complete the inner circle.

The centre contains a small circle of padded background material with small and scattered french knots. The surrounding circle is larger french knots. The radiating lines are french knots stitched in shades of mauve and green. The green thread is the same shade as the background fabric.

All the plants are stitched using only four embroidery stitches. These are straight, detached chain, buttonhole and french knots. Yes, it was a challenge to portray all these wildly different plants with such a basic and limited number of stitches. Multiple colours of DMC Floss are used. The threads are blended/mixed in the needle to obtain the correct colour for natures’ choice of each plant and flower.

Precise directions and diagrams for stitching each plant are included in the text.

None of this is difficult but it is a different way of portraying flowers. As well as creating a garden which is what most students did, these flowers are useful for small projects such as greeting cards, phone covers and glasses cases all of which you will find in the book.

[do_widget id=arpw-widget-2]

Green seems to be a difficult colour to photograph accurately. This green fabric is a soft gray green and shows off all the greens used for the leaves. When stitching green thread on green fabric, one often has to change the proportions in the thread colour recipe for them to be seen clearly.

I have discovered why fashion photographs so seldom portray green except for really dark or bright greens. This is something I had never noticed before photographing the flowers for this book.

If you are interested in this book, or its companion, Hand Stitch Recognizable Summer Flowers, you can find them at eBookIt.com It is published in an ebook format to make it affordable for everyone.

Professionally colour printing a book with as many colour photos and diagrams as are included in this text is expensive. You can print it on your home colour printer.

If you would like a printed copy, please email me at ann@annbernard.com

The next entry will feature more gardens stitched by students.

05/12/2017 by Ann Bernard

The Battle of Stamford Bridge, the second battle of 1066

Stamford Bridge

Having won the Battle of Fulford, the Vikings took some time off. They did not burn the City of York as they had Scarborough but, as victors, they collected tribute in the form of goods and hostages. For late September, the weather was unseasonably hot. The Vikings made camp on the western and eastern sides of the River Derwent. In this portion of one of fifteen panels, the Viking army is relaxing. The leaders, King Hadrada and Earl Tostig, gave the men permission to leave off their mail shirts which they returned to their ships. The dust storm created by the arrival of the Saxon army is indicated on the upper right.

Meanwhile, in the south of England, Earl Harold Godwinson (King Harold) had his army trained and ready to meet the expected invasion from Normandy. In Normandy, Duke William had spent all summer building boats, making armour, collecting horses and training men for his invasion army but the wind and tides had been unfavourable all summer for such an undertaking. They waited, as did King Harold and his army in England.

King Harold heard about the Viking invasion in Scarborough. The Vikings had a bad reputation which made them unacceptable immigrants. King Harold gathered some/all of his army and marched them north to York. The distance between London and York is 216 miles (347 kms) and the roads were not as they are today. It is said that they did this march in four days but, this is so remarkable that I can only think that they started out before the Battle of Fulford on September 20.

Their arrival at Stamford Bridge and their attack on September 25 was unexpected. The Vikings on the western (wrong end) of the narrow, wooden bridge were trapped. The bridge was a bottle neck being defended by one elite viking warrior known as a berserker. A berserker wore a bear fur collar (baer sarkr, or bear shirt). They were fed psychedelic mushrooms before a battle, and killed anyone in front of them until they were killed, or ran out of enemies – hence our modern word berserk! (Thank you, Heather Cawte for this information). The beserker was finally felled by a saxon who floated down the river and speared him from below. These figures are not yet completely stitched.

After that, the armies formed up in the manner that was traditional for the time and a bloody battle was fought with huge losses on both sides. Both King Hadrada and Earl Tostig died. The section of the army left guarding the boats led by King Hadrada’s son-in-law (who was also killed) arrived in haste but the victory went to the Saxon army.

I was unable to locate a stitching that I was sure was of the battle. Instead, this photo, taken in July 2017, shows visitors viewing the work-in-progress. The tapestry is stitched on linen fabric, a cotton backing and uses Appletons wool threads. The design is placed on the cotton backing, marked through the front linen with running stitch. It is then outlined with stem stitching and filled with Bayeux stitch. Chris Rock designed the tapestry, the volunteer stitchers are under the leadership of Shirley Smith. They have some kits available if you would like to stitch a small piece for yourself or to contact them, go to publicity@stamfordbridgetapestry.org.uk

[do_widget id=arpw-widget-2]

The final picture is of the longboats returning to Norway. Out of the 300 boats that landed, only 24 were needed to take the survivors home. Two generations of men were in that invasion army. We have also experienced this huge loss of men in more recent times. The Vikings promised to never, ever invade England again. The days of Viking supremacy were over. They stayed home, recovered, and became Norwegians.

The information here may or may not be correct. Brevity is not always the best sieve for historical information. The videos below are recent and were filmed on location and will be more accurate.

Battle of Stamford Bridge Tapestry Project 1066 – 2016

Battle of Stamford Bridge Tapestry Project 1066 – 2016

Baz Battles. Historical informational video

BATTLE OF STAMFORD BRIDGE TAPESTRY PROJECT 1066-2016

Although Stamford Bridge was a great triumph for King Harold and the Saxons, their strength was sadly depleted by the fight. And now they faced an even greater foe as news arrived that Duke William of Normandy had landed in Sussex on September 28. The weary Saxons turned south once more and marched back as quickly as they had come.

Read the third and final episode to hear what really happened at the Battle of Hastings.

Search

Recent Posts

  • Laid Work – Introduction.
  • How to stitch Snowdrops. Quick and Easy!
  • Inspirations, All Stitched Up! from Australia
  • Newsletter Märchenhaftes Sticken – Jessica Grimm
  • Cotton Quartet 1: Preliminaries & First Stitches

Recent Comments

  • Ann Bernard on Prepare your embroidery for the framers – Mount on Foam Core Board
  • SGibau on Prepare your embroidery for the framers – Mount on Foam Core Board
  • Louise Desmarais on Prepare your embroidery for the framers – Mount on Foam Core Board
  • Katherine & Malcolm Bell on Embroideries that Record History
    Queen Mary’s Carpet
  • Ann Bernard on Embroideries that Record History
    Queen Mary’s Carpet

Pretty Chic Theme By: Pretty Darn Cute Design