In early September 1950, the rest of my life started. Having just turned 17, and leaving an unhappy school life behind, I started travelling daily from an outer region of London into Kensington and Prince’s Gate.
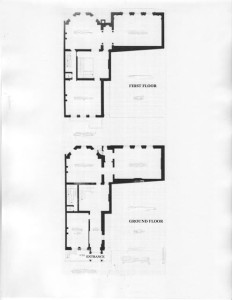
Royal School of Needlework Floor Plan
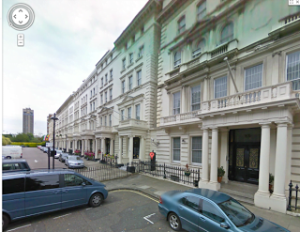
RSN was housed in a magnificent building which had seen even more grandiose days in the previous century. The central hallway was two stories high, wood panelled, and had an impressively grand staircase and upper landing with a railing along two sides forming a balcony. The room beside the front door was an office. The other two rooms on the ground floor were large and gracious with floor to ceiling french doors or windows that opened onto a stone terrace. Beyond this was a sunken garden with large trees and an immaculate lawn. You can see this hidden garden on Google Maps aerial view; viewing it today makes me wonder, idly, how many other such hidden gardens there are in London.
One floor up, the workroom occupied the front room while the class rooms were in the two elegant rooms overlooking the garden. These rooms all had light coloured panelled walls and parquet floors. New overhead lighting had been installed and we had no trouble stitching anywhere in the rooms though most of us had young eyes. This is where our easels with slate frames stood. The easels were all ancient and finding and keeping a matching pair was a challenge. The cleaners could get them mixed up. There was also a huge high table where our teachers, or us, cut fabric, transferred the design (prick and pounce) and finally mounted it and laced it onto masonite. On the floors above were more class rooms where we learned history, dressmaking, pattern drafting, design, and something called small samplers.
Elegant as all this sounds, let’s get down to reality. English society was still full of rules, regulations and restrictions and it never occurred to us (or to me, anyway) to question them. We were not allowed to enter through the front door but instead went down the stairs by the front door to the basement where we left our coats. We were not allowed to enter the front hall or walk on that magnificent stairway but used the steep and narrow servants’ staircase instead. You can see this on the left side of the floor plan. It was a long climb to the upper floors. We were not allowed to enter the workroom or talk to the staff. The showroom containing the threads and other supplies was located on the main floor in the larger room at the back. It was off limits except to select thread colours. Mostly, the threads and wools were set and did not require us to make choices. We were absolutely forbidden to set foot on the terrace or go into the garden. Did I feel hard done by? No. This was normal in England at that time and for a long time after, too. No one questioned this that I was aware of. We knew and expected nothing else.
And we started to learn our stitches immediately. We all knew the basic stitches but we had to stitch them perfectly or else they came out. Others were new to us, particularly the composite stitches which contained several stitching stages; I do not think I have used any of them since then. Feeling very virtuous, I stitched small. Not only can I now no longer identify the structure of the stitch but it made me slow with the result that I was the last one in our group of about seven students to complete their work. Being last meant that I had the last choice of background linen fabric for the next sampler and finished with a brilliant pink which I hated and still do. This second sampler was appliqué and on it we learned to stitch accurately and fast. It was a boring project and I think that everyone was glad to complete it. Frankly, it was sufficiently tedious and demanding enough to make anyone but the determined quit on the spot. Having survived that one, we progressed to the crewel work sampler stitched with wool on linen twill. I do not know what the wools we used were. Certainly not Medici. Materials and thread for embroidery still had limited availability but RSN had a stock on hand from prewar days. There seemed to be enough of everything but colour ranges and choices were not always complete. Our teacher, Marguerite Randell, was excellent. She was elderly but eternally patient and always available when you needed assistance. But, she had her standards. Stitching had to be up to that standard, and the best you could do or else it had to come out. Some careful snipping of threads released the offenders but the remainders (called dead stitches) had to be removed in their entirety. I remember clearly, being in a hurry to get on to the next stage and not getting all the thread whiskers out. She sat down and told me this was inadequate. The offenders were quickly removed but it was a very very long time before she came back to show me the next stage. A lesson never forgotten.
Next entry: We continue to stitch, the press comes to call and we meet other students.